
6 Easy Home Projects You Can Do With Reclaimed Wood
By: John Garcia | Date Posted: January 27, 2022
Table of Contents
Venturing into the world of do-it-yourself (DIY) projects with reclaimed wood is believed to be beneficial in so many ways. You never know what exceptional items you can create out of the scrap wood that most people want to get rid of until you explore Home Projects You Can Do With Reclaimed Wood.
Some people choose just to throw their scrap wood away. However, did you know that recycling them to be of good use not only saves the planet but your wallet as well?
Because reclaimed timbers are said to be far cheaper than the lumber sold in lumber stores, you’ll surely be able to create a beautiful household item out of little cash. Not just that, aesthetics-wise, it’s considered top-notch. If you want to have that rustic or vintage vibe, you’ll never go wrong with using reclaimed wood products.
And if you want a gorgeous river table in your home, you may convert your reclaimed wood. Here’s a tutorial on how to make a cedar table with epoxy. River tables are a fantastic piece of furniture that could add a rustic vibe to your home. You can set them as a focal piece of furniture that could become a conversation piece when you have guests over.
If the idea of utilizing reclaimed wood for your upcoming DIY projects seems to be particularly interesting, check out the following easy crafts that you can do with reclaimed wood:
Wooden Bar Table
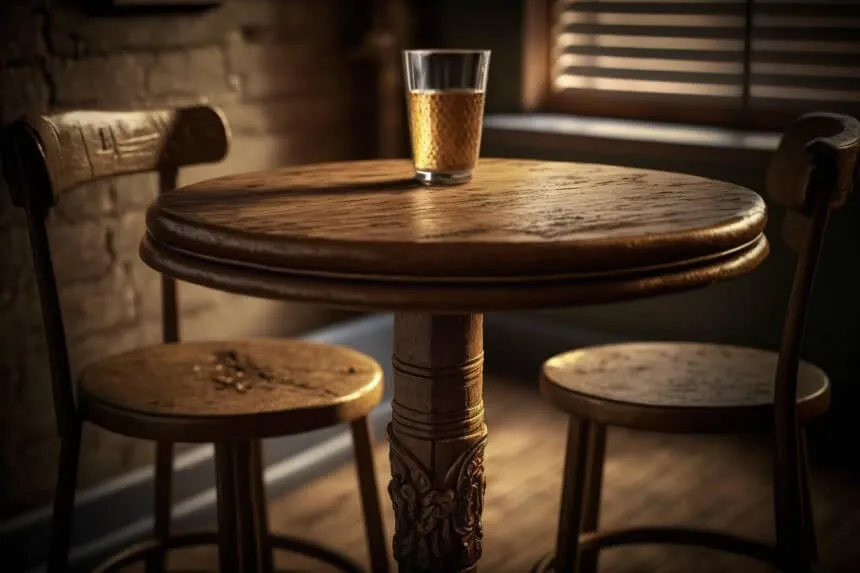
A bar table will definitely up your hosting skills as you can easily serve drinks to your guests or friends as they arrive for a night of socialization. Having this prominent feature will wow your guests and impress them, especially if you have mastered your cocktail-making skills.
Bar tables might not be present in every home, but they’ll undoubtedly elevate your home’s aesthetics while offering outstanding service. Nevertheless, bar tables can be pretty pricey, especially when it’s made from top-quality materials.
Making your bar table out of reclaimed wood can be pretty tricky to imagine but is undoubtedly doable.
To do so, simply cut four pieces of 2”x2”x36” of reclaimed wood for the legs. As soon as you have them, attach them to a 24”x36” plywood using either screws or nails. You can also glue together your scrap wood to create a board and then cut it according to the aforementioned size.
Using two pieces of 2”x2”x36” wood, screw these in the middle of the legs, 8 inches above the ground, to serve as the center joint. Doing so will strengthen your table, ensuring it won’t wobble during use.
Sand it properly so that it won’t scratch anyone’s skin and give your paint a smooth finish. You can either paint it with varnish to retain its natural color or paint it with your preferred color.
Floating Shelves And Brackets

Shelves are undoubtedly helpful in every home. Whether it’s for your kitchen, living room, or bedroom, it does play an essential role in that area. Not only will it make good use of your humble walls, but it’ll also give you extra space for storage or decoration without eating up floor space. Thus, it’s very useful in areas where space isn’t available.
If you’re looking for a rustic or naturalist shelf design to match your bohemian or minimalistic house theme, this design is totally for you! You can use scrap wood or baseboards in making your very own fixtures like shelves and brackets.
Floating shelves can be an excellent way to display your collectibles and other precious items since they would be at a higher place that kids and pets can’t reach.
To start, simply make a board out of reclaimed wood at home by gluing them together. Cut the board according to the shelf size that you need. If your wall is wide and spacious, having a big shelf would be better. Sand it out to create that smooth texture. Finish it off with nice natural paint, and voila! Easy as pie!
Umbrella Stand

Umbrellas are indeed handy during both sunny and rainy seasons. Yet they seem to always get displaced because of their small size. That’s why having an umbrella stand is equally essential. Not only will it give you a specific area to keep your umbrella before and after use, but it’ll also make sure that no one slips on a wet floor because of a dripping umbrella sitting just around the corner.
You can easily create one by assembling a square box without a lid on. Make sure that it has a base to catch the dripping water. The height must be tall enough to cater to long umbrellas.
Who knows that an old piece of wood can be made into something functional like this?
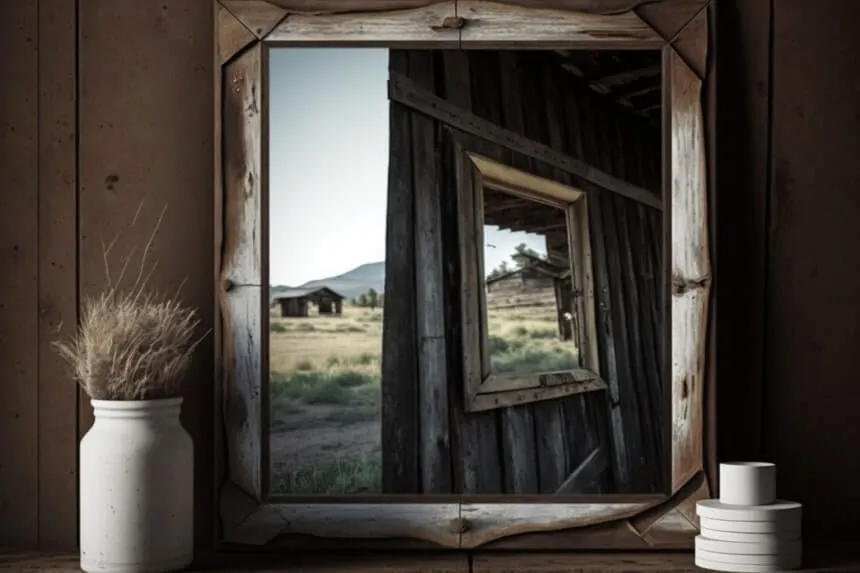
If you want to elevate the aesthetics of your home, you can easily create a rustic wooden frame for your wall mirrors.
To begin, simply measure the size of the mirror that you have and create a wooden frame for it. You can easily glue the end of a wood piece to the end of another wood, making a rectangular-shaped frame. Sand and paint it off.
Then, easily attach your existing mirror to the back of the frame using silicone glue that’ll work both for mirrors and wood material. Indeed, creating your very own DIY mirror frame has never been this easy!
If it’s big enough, the rustic mirror frame can be placed in the foyer and it would be a nice piece of furniture to welcome anyone coming inside the house. If you have a small one, it would be nice to place it in your powder room or bathroom.
Is your bedroom dull? Make it extra by creating a wooden headboard. Not only will it upscale the overall vibe of your room but also keep your wall paint safe from scratches.
To make one, simply measure the width of your bed. The general rule of thumb is that your headboard should be the same width as your bed. Now that you have the measurement, simply cut out reclaimed wood pieces and glue them together to create a board that’ll match the size you’ve listed earlier.
You can install additional cushioning by stapling a foam above the wood and covering it with your preferred cloth. You can also leave it pure wood to give you that rustic vibe. Finish it off with the paint color of your choice. Learn it securely on a solid wall or install it directly with screws and a screwdriver.
Serving trays are essential when serving food or drinks to your loved ones or guests. Creating a rustic wooden serving tray will not only give you convenience and ease when you need to hand out food, but it’ll also give you the confidence to know that you made it your own.
Simply cut out a rectangular-shaped tray according to your preferred size from a wooden board or wood panel. Buff it off with sandpaper and finish it off with a paint of your choice.
Conclusion
Indeed, using reclaimed wood in your DIY projects is genuinely beneficial in so many ways. Not only will it save you money, but it can also unleash creativity from inside you while protecting the environment.
If you just consider using them, you’ll surely be able to create beautiful woodwork out of scrap. Though it’ll require more work, it’s worth the effort.
Hopefully, this feature has helped you learn new ideas for making good use of your reclaimed wood.
Thank you for reading!